Reading the Grid: Understanding the Dimensions
If you haven’t already, check out our first post around understanding the Grid Reading the Grid: a Map of Human Behaviour
A couple of weeks back I wrote about the Grid within your hoozyu report, and covered some of the key stuff it helps us to understand, both about ourselves and those around us.
In this post I want to talk a little more about the Grid itself - namely the dimensions, and what the horizontal and vertical axes actually represent.
Let’s start by looking at the vertical axis.
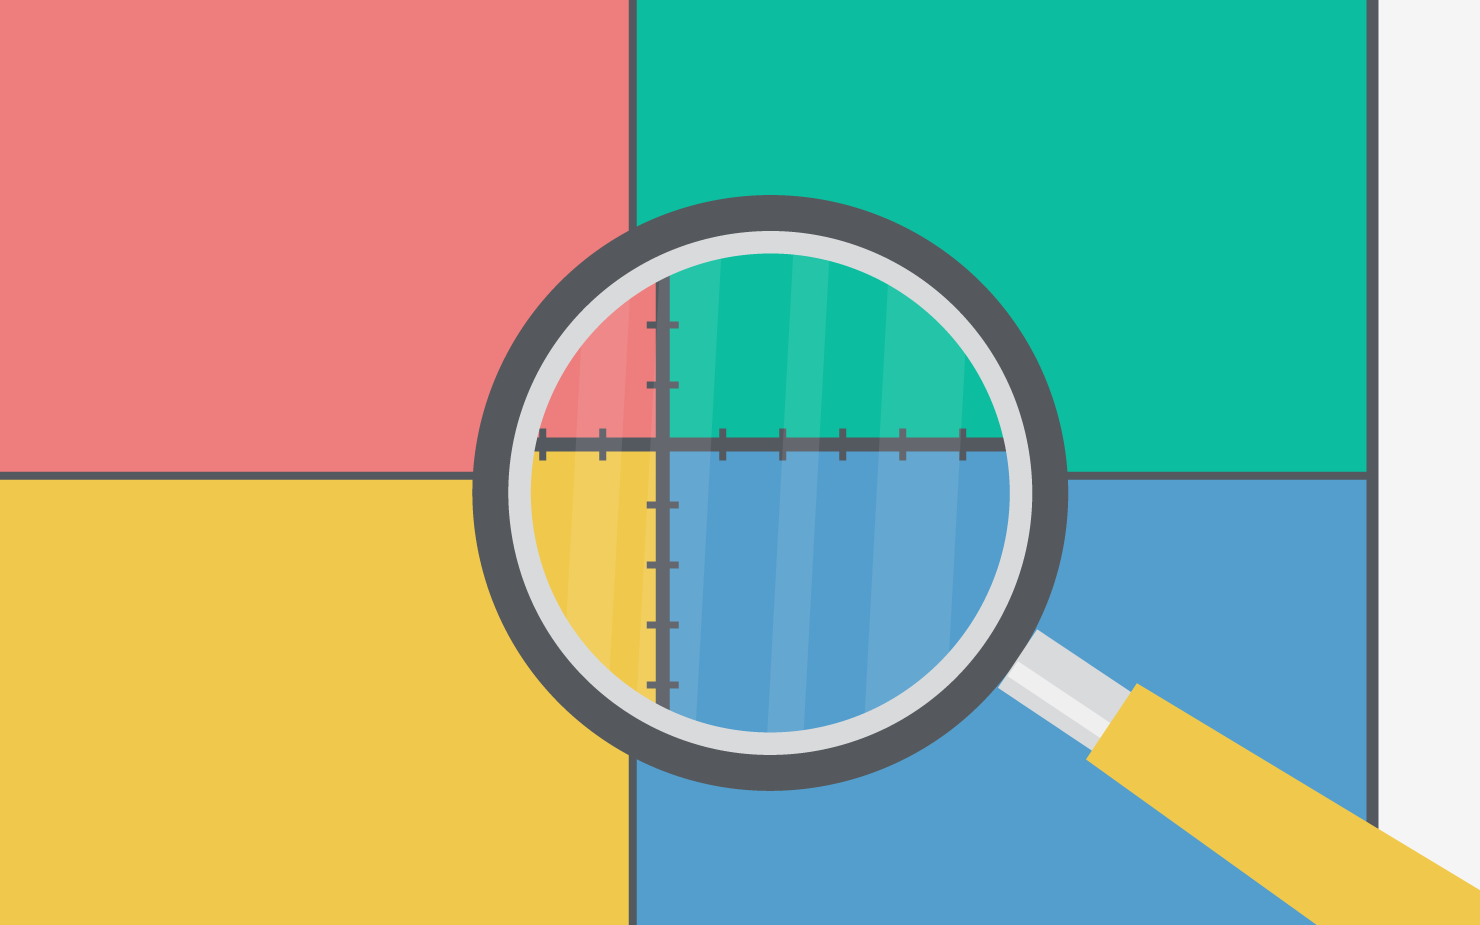
This axis is all about Communication & Involvement, and it indicates to us how Direct or Indirect an individual will be in terms of their Usual Behaviour, or Needs / Stress.
So, for example, if your Usual marker (the Diamond on the Grid) is right near the top (i.e. in the upper regions of Red or Green), this means that you are likely to be pretty direct when communicating with others. You’re probably pretty straightforward and just say what you mean.
If, however, your Usual marker is right near the bottom of the Grid (i.e. in the lower regions of Yellow or Blue), you likely communicate with much more care and diplomacy, and may try to avoid being too direct or abrupt in the way you speak to people.
If your marker is somewhere in the middle, this indicates that you have no clear preference for directness or indirectness, and that you probably function with some balance of the two.
How about Need and Stress?
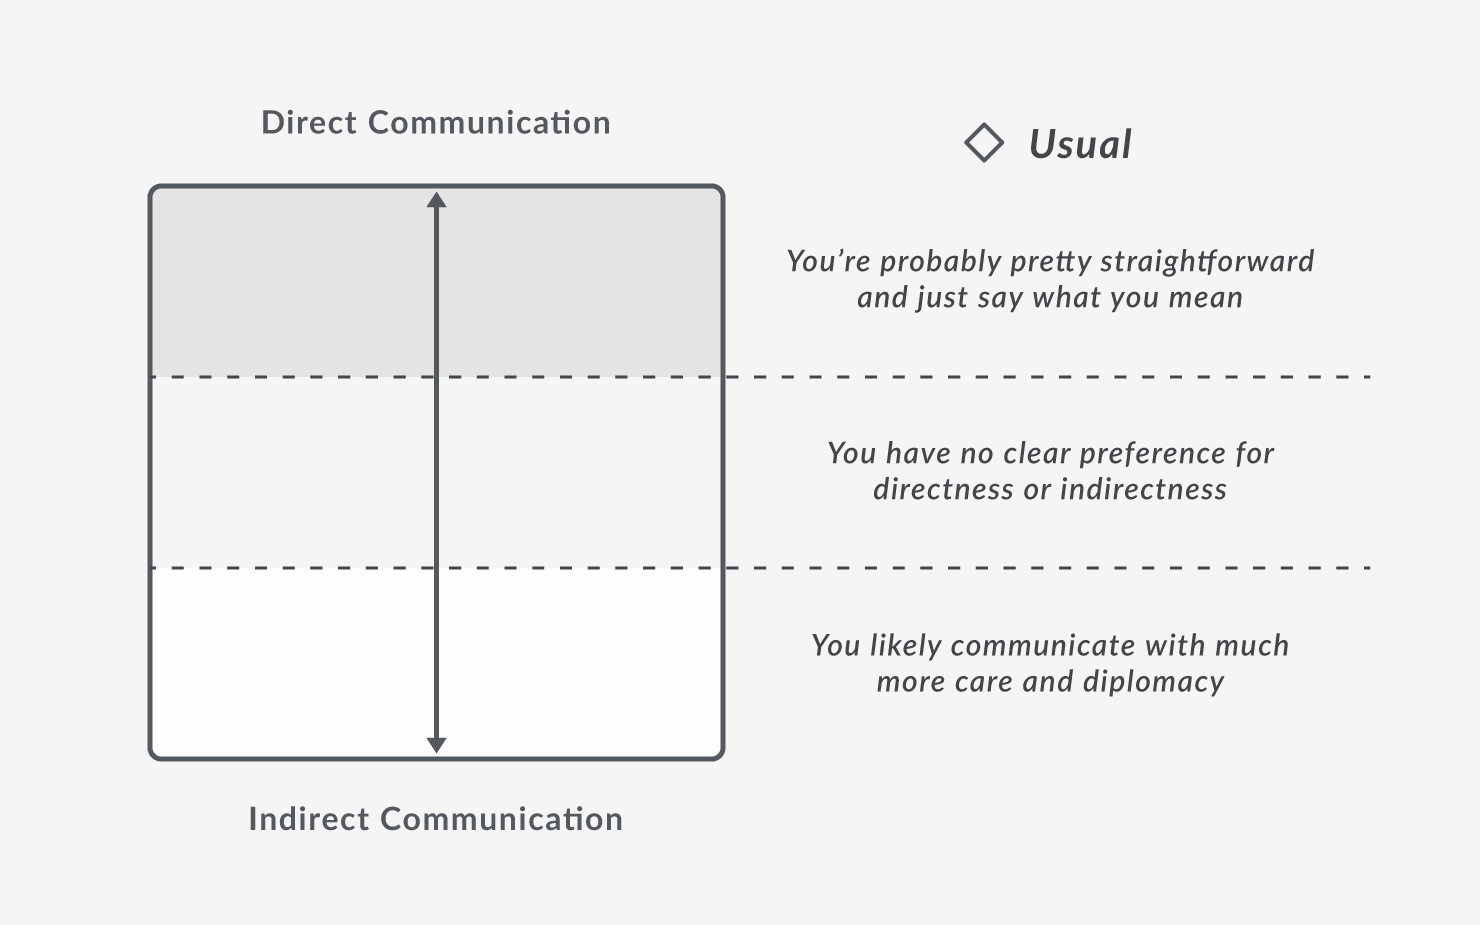
If your Need / Stress markers (the superimposed Circle and Square) are at the top of the Grid, this indicates that you probably value directness and straightforward honesty from people, and may become overly direct yourself if you find others being too indirect or diplomatic with you!
If your Need / Stress markers are right near the bottom of the Grid, this indicates that you probably need a fair amount of diplomacy in the way others communicate with you. If you find people being too abrupt or direct in the way they talk to you, you may find yourself withdrawing and becoming uncommunicative in return.
Once again, markers somewhere in the middle indicate that you value a balance of directness and diplomacy from others, and may find either extreme uncomfortable to deal with!
Although it appears as 4 coloured boxes, it’s important to note that the whole Grid is actually a fine-grained scale. That means that however far up or down the Grid your markers appear, that is an exact positioning on the ‘Directness’ scale.
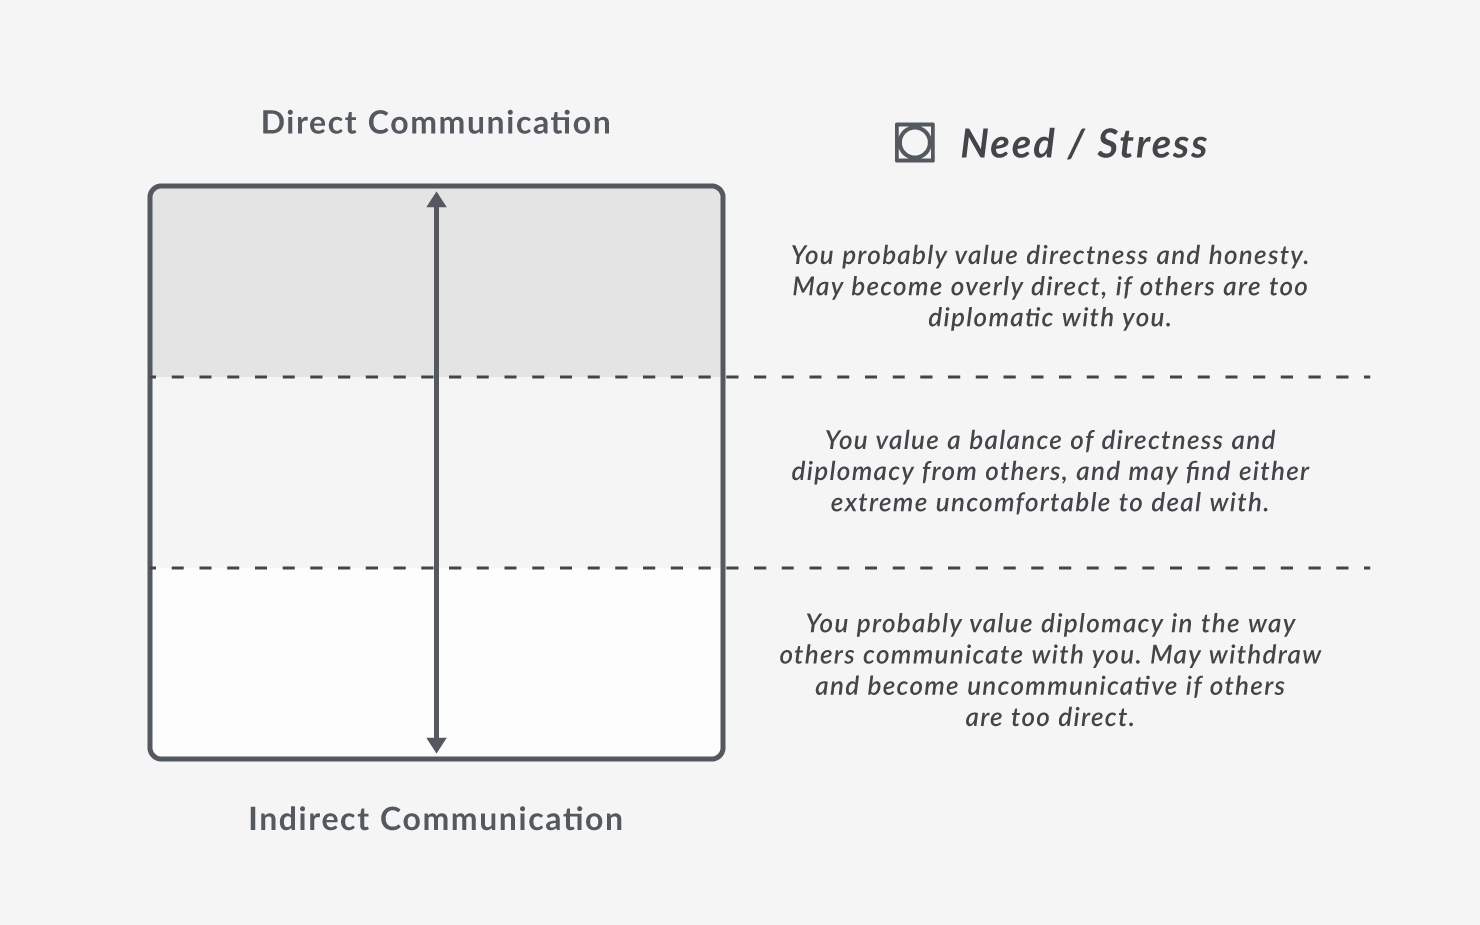
We can say the same of the horizontal axis, which measures Task / People Focus.
However far to the left or right of the Grid your markers appear, that is an exact measure of how much your focus is on either completing tasks themselves, or on the people involved in getting the tasks completed.
So, for example, if your Usual marker is on the far left of the Grid (i.e. the far edge of Red or Yellow), this indicates that you probably tend to just focus on the task at hand, and if there are problems amongst the people you are working with, you are likely to finish the job first and then deal with the people problems.
If your Usual marker is to the far right of the Grid (i.e. the far edge of Green or Blue), this indicates that although you will get the job done, your focus will likely be more on the people who are involved in the task, than on the task itself. If problems arise amongst the people, you may stop the task in order to address the issues, so that you can get people working better.
If your marker is somewhere in the middle, this indicates that you take a fairly balanced view and can appreciate the importance of both the task itself, and the people involved.
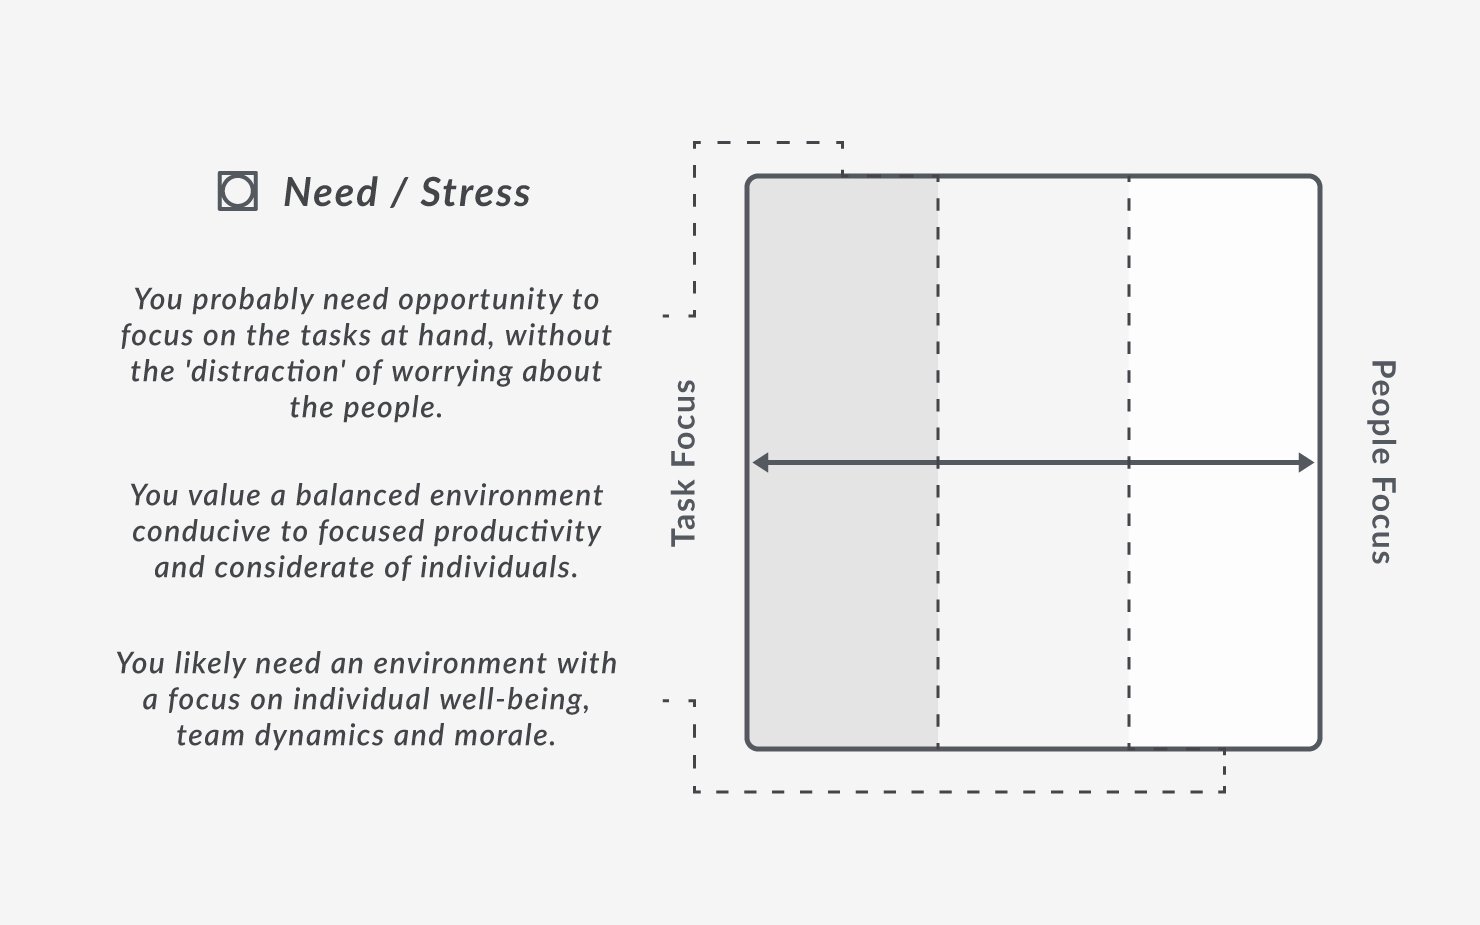
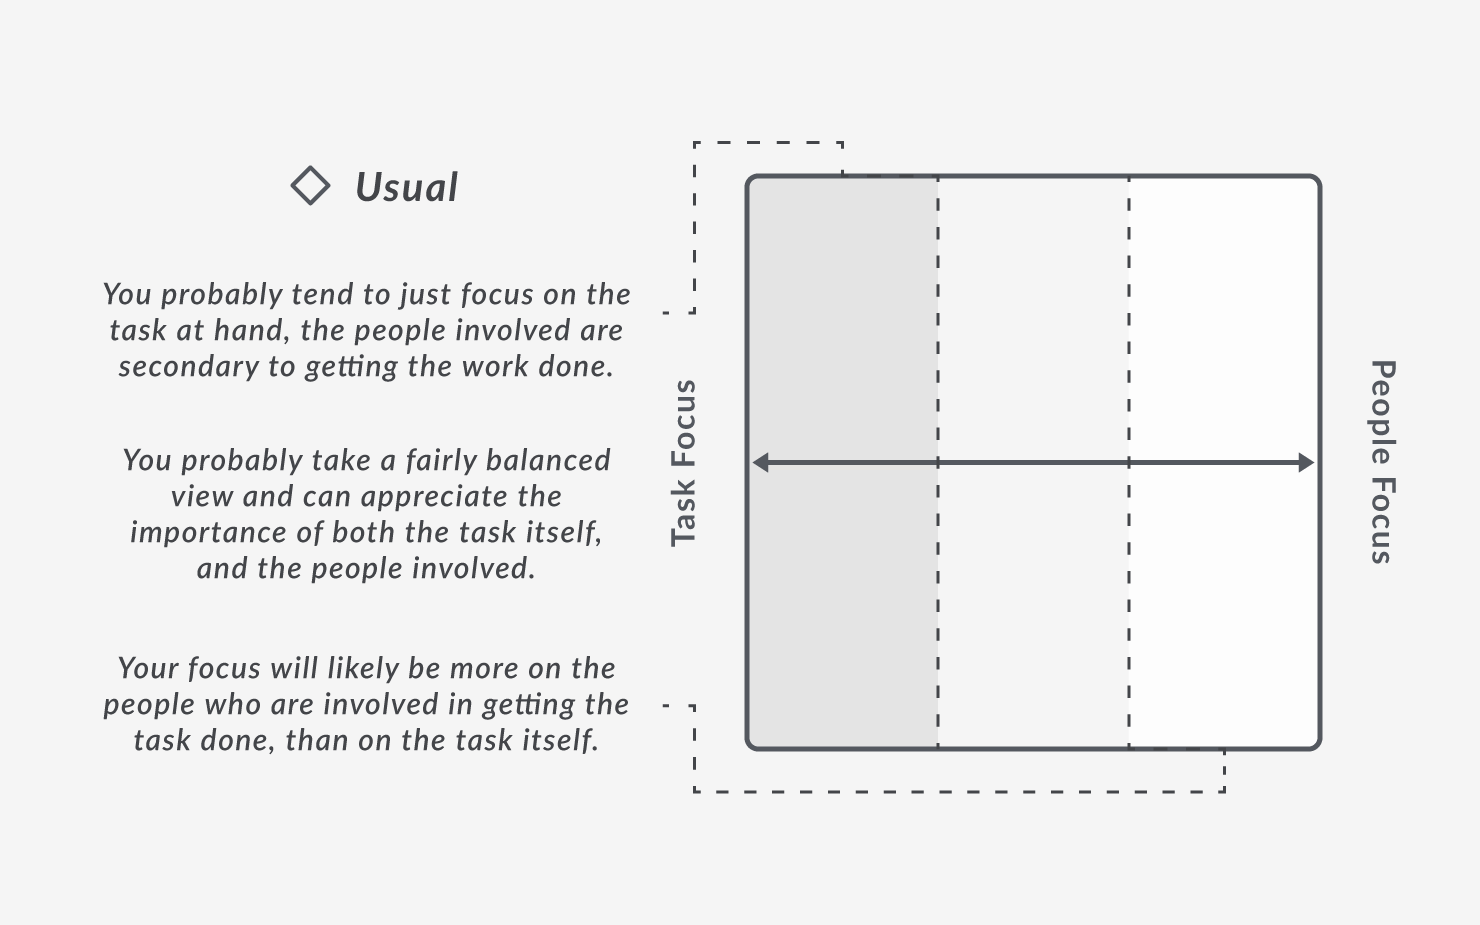
In terms of Need and Stress: if your markers are on the far left of the Grid, you probably need to be allowed to focus on the tasks at hand, without the seeming ‘distraction’ of worrying about the people. And you may get frustrated by any interruptions to workflow and productivity arising out of such issues.
If your Need / Stress markers are on the far right of the Grid, you likely need an environment in which due consideration is given to team dynamics and morale, and where ‘people issues’ are addressed as they arise. You may get demoralised by an environment where you perceive there is a cold focus on just getting the job done.
Once again, markers somewhere in the middle indicate that you value a balanced environment which enables both focused productivity and due consideration to individuals.
That’s a lot to take in, I know! But there’s one last thing I want to cover:
These dimensions (Direct / Indirect / Task Focus / People Focus) are what give us the 4 ‘regions’ on the Grid, represented by the 4 colours.
- Direct + Task Focus = Red
- Direct + People Focus = Green
- Indirect + People Focus = Blue
- Indirect + Task Focus = Yellow
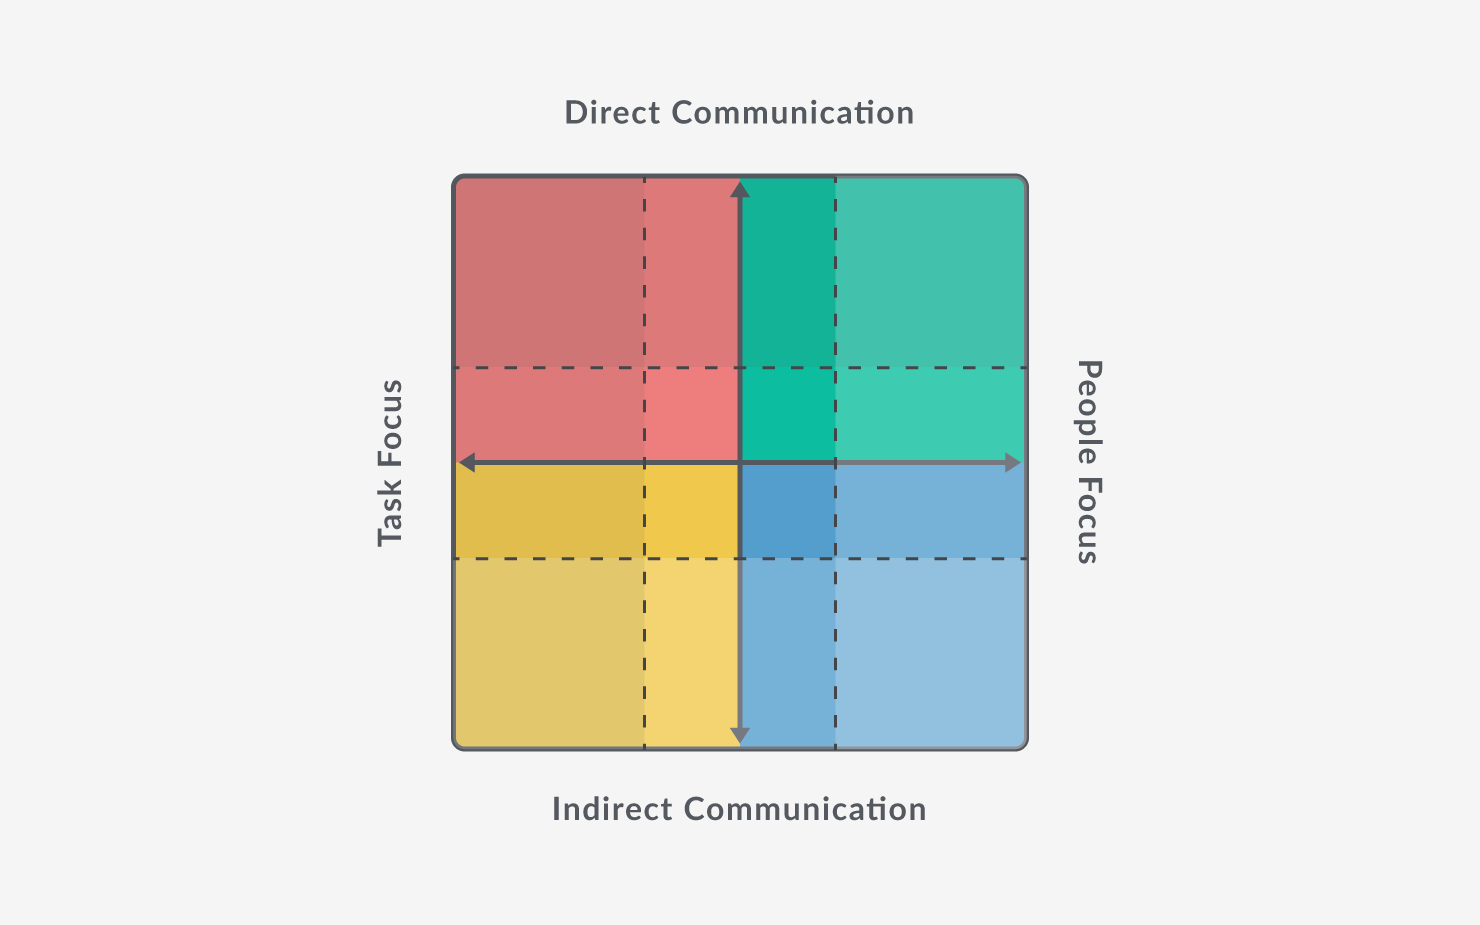
The furthest corner of each of these regions is where you’ll find the strongest match to the corresponding descriptions, while at the very centre of the grid there is likely to be a fairly equal balance across all the dimensions!
So that’s the Grid. If you want to go a step further, you can also read about the Diagonal Axes on the Grid and how we use them in an organisational context…